

With iOS 26, Apple introduces the Basis Fashions framework, a privacy-first, on-device AI toolkit that brings the identical language fashions behind Apple Intelligence proper into your apps. This framework is obtainable throughout Apple platforms, together with iOS, macOS, iPadOS, and visionOS, and it supplies builders with a streamlined Swift API for integrating superior AI options immediately into your apps.
Not like cloud-based LLMs equivalent to ChatGPT or Claude, which run on highly effective servers and require web entry, Apple’s LLM is designed to run totally on-device. This architectural distinction provides it a novel benefit: all information stays on the person’s gadget, guaranteeing privateness, decrease latency, and offline entry.
This framework opens the door to an entire vary of clever options you possibly can construct proper out of the field. You’ll be able to generate and summarize content material, classify info, and even construct in semantic search and personalised studying experiences. Whether or not you need to create a wise in-app information, generate distinctive content material for every person, or add a conversational assistant, now you can do it with just some traces of Swift code.
On this tutorial, we’ll discover the Basis Fashions framework. You’ll study what it’s, the way it works, and the way to use it to generate content material utilizing Apple’s on-device language fashions.
To observe alongside, be sure you have Xcode 26 put in, and that your Mac is operating macOS Tahoe, which is required to entry the Basis Fashions framework.
Able to get began? Let’s dive in.
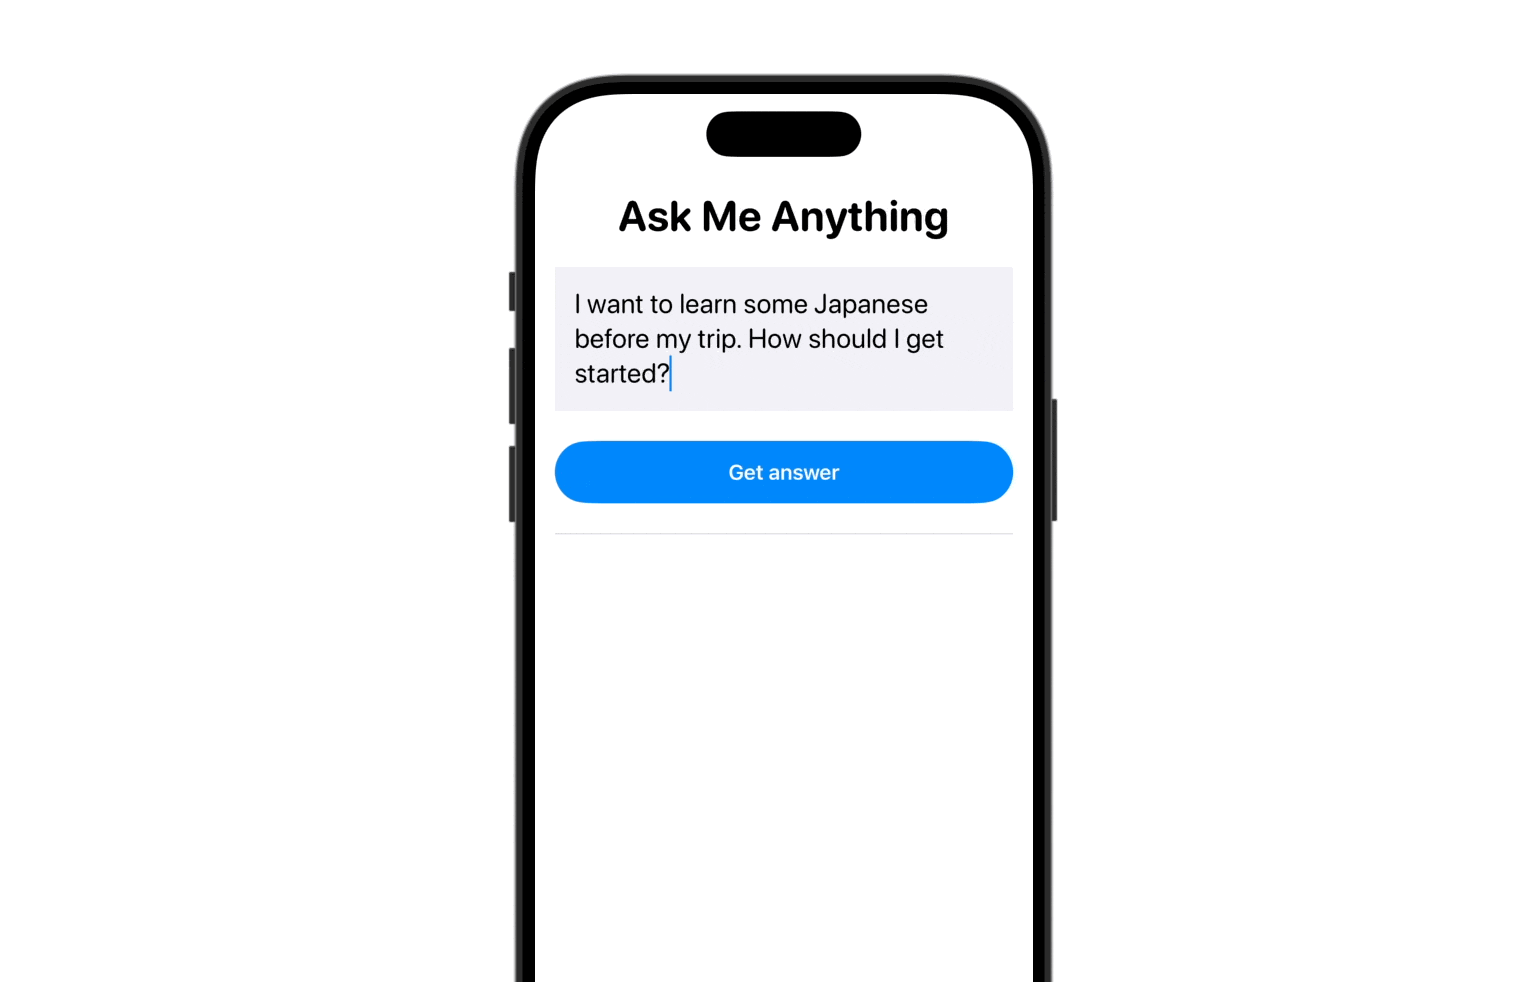
The Demo App: Ask Me Something
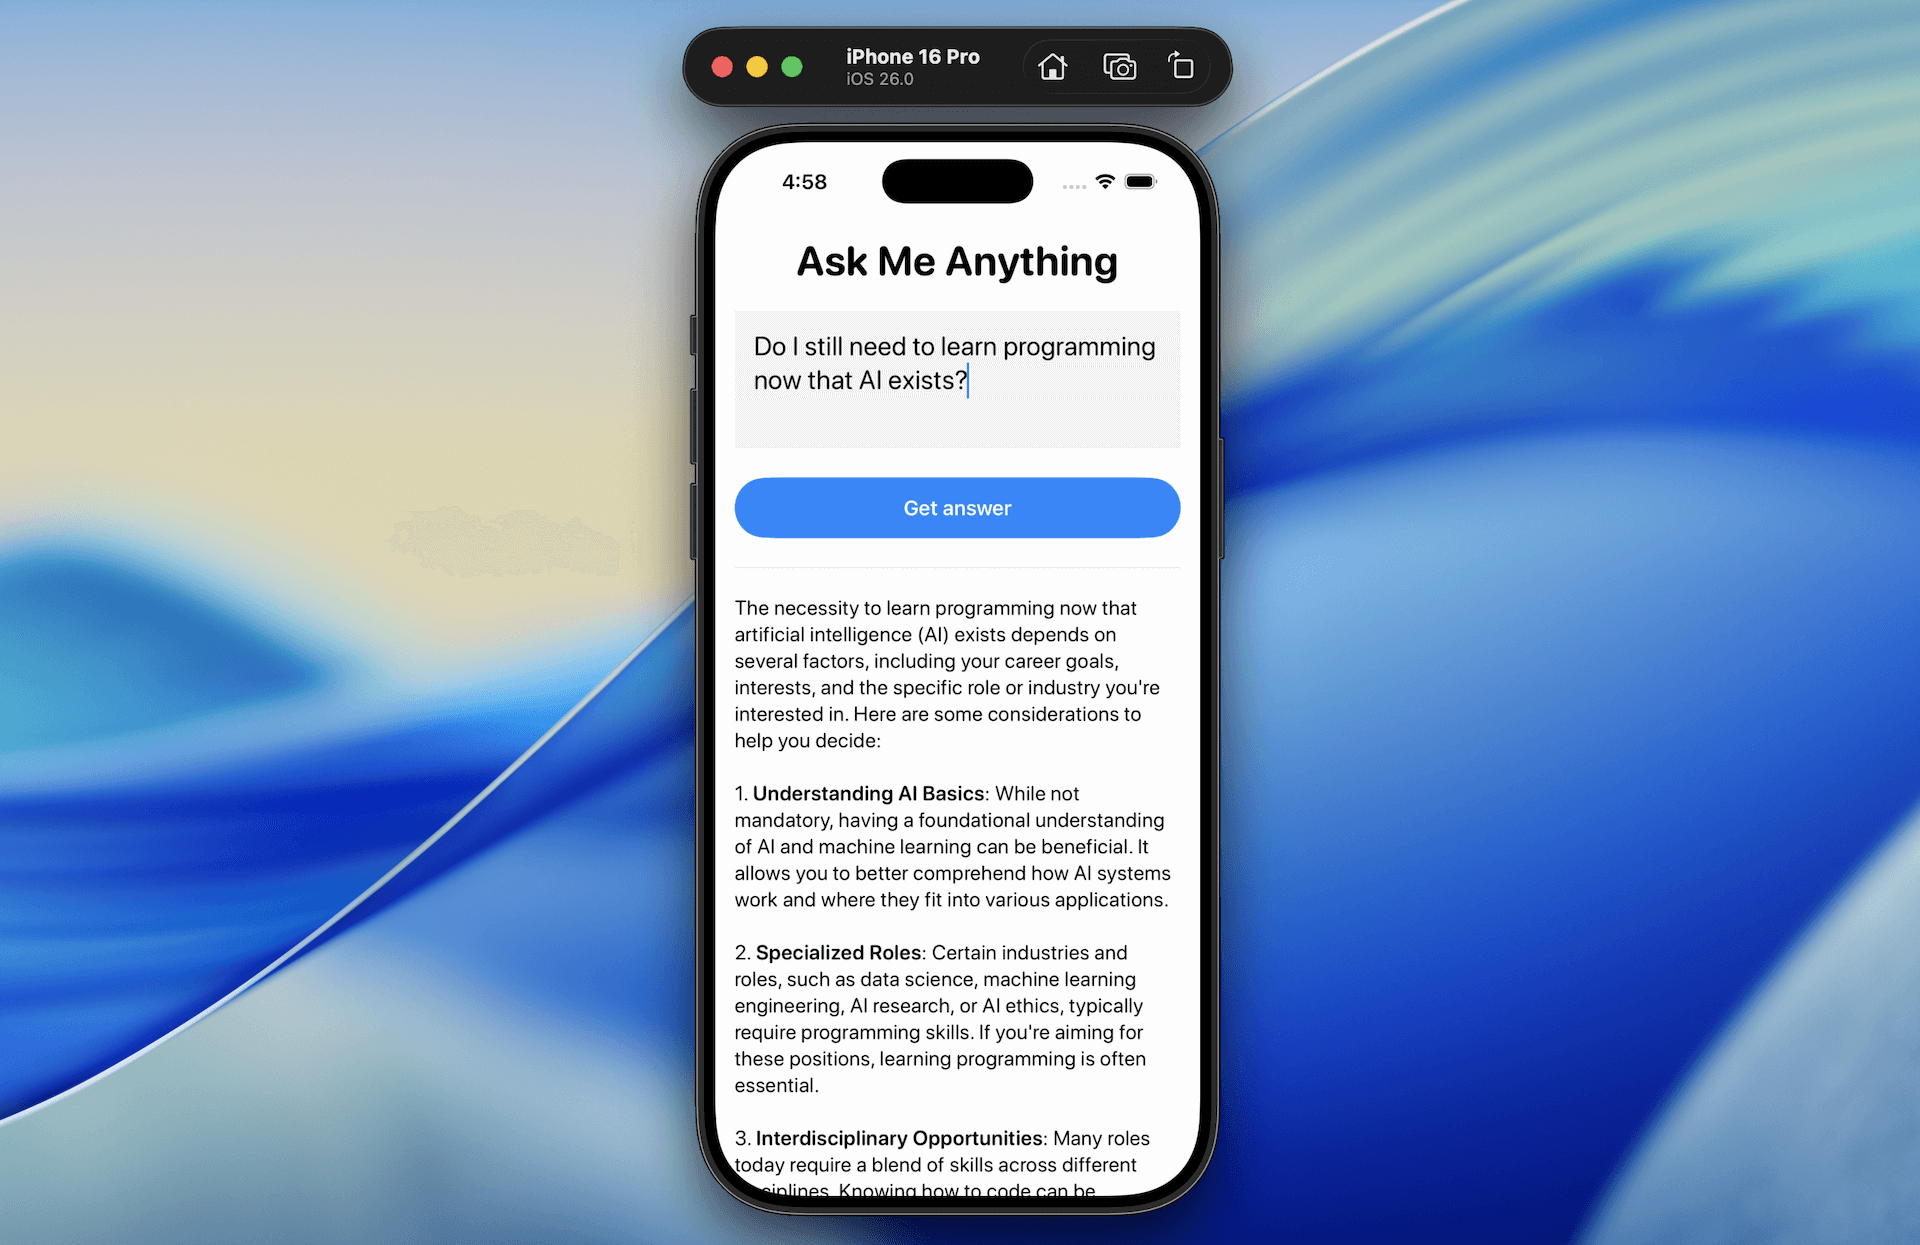
It’s at all times nice to study new frameworks or APIs by constructing a demo app — and that’s precisely what we’ll do on this tutorial. We’ll create a easy but highly effective app referred to as Ask Me Something to discover how Apple’s new Basis Fashions framework works in iOS 26.
The app lets customers kind in any questions and supplies an AI-generated response, all processed on-device utilizing Apple’s built-in LLM.
By constructing this demo app, you may learn to combine the Basis Fashions framework right into a SwiftUI app. You will additionally perceive the way to create prompts and seize each full and partial generated responses.
Utilizing the Default System Language Mannequin
Apple supplies a built-in mannequin referred to as SystemLanguageModel, which provides you entry to the on-device basis mannequin that powers Apple Intelligence. For general-purpose use, you possibly can entry the base model of this mannequin through the default property. It’s optimized for textual content era duties and serves as an incredible place to begin for constructing options like content material era or query answering in your app.
To make use of it in your app, you may first must import the FoundationModels framework:
import FoundationModels
With the framework now imported, you may get a deal with on the default system language mannequin. Right here’s the pattern code to try this:
struct ContentView: View {

    personal var mannequin = SystemLanguageModel.default

    var physique: some View {
        change mannequin.availability {
        case .obtainable:
            mainView
        case .unavailable(let cause):
            Textual content(unavailableMessage(cause))
        }
    }

    personal var mainView: some View {
        ScrollView {
            .
            .
            .
        }
    }

    personal func unavailableMessage(_ cause: SystemLanguageModel.Availability.UnavailableReason) -> String {
        change cause {
        case .deviceNotEligible:
            return "The gadget just isn't eligible for utilizing Apple Intelligence."
        case .appleIntelligenceNotEnabled:
            return "Apple Intelligence just isn't enabled on this gadget."
        case .modelNotReady:
            return "The mannequin is not prepared as a result of it is downloading or due to different system causes."
        @unknown default:
            return "The mannequin is unavailable for an unknown cause."
        }
    }
}
Since Basis Fashions solely work on units with Apple Intelligence enabled, it is vital to confirm {that a} mannequin is obtainable earlier than utilizing it. You’ll be able to test its readiness by inspecting the availability property.
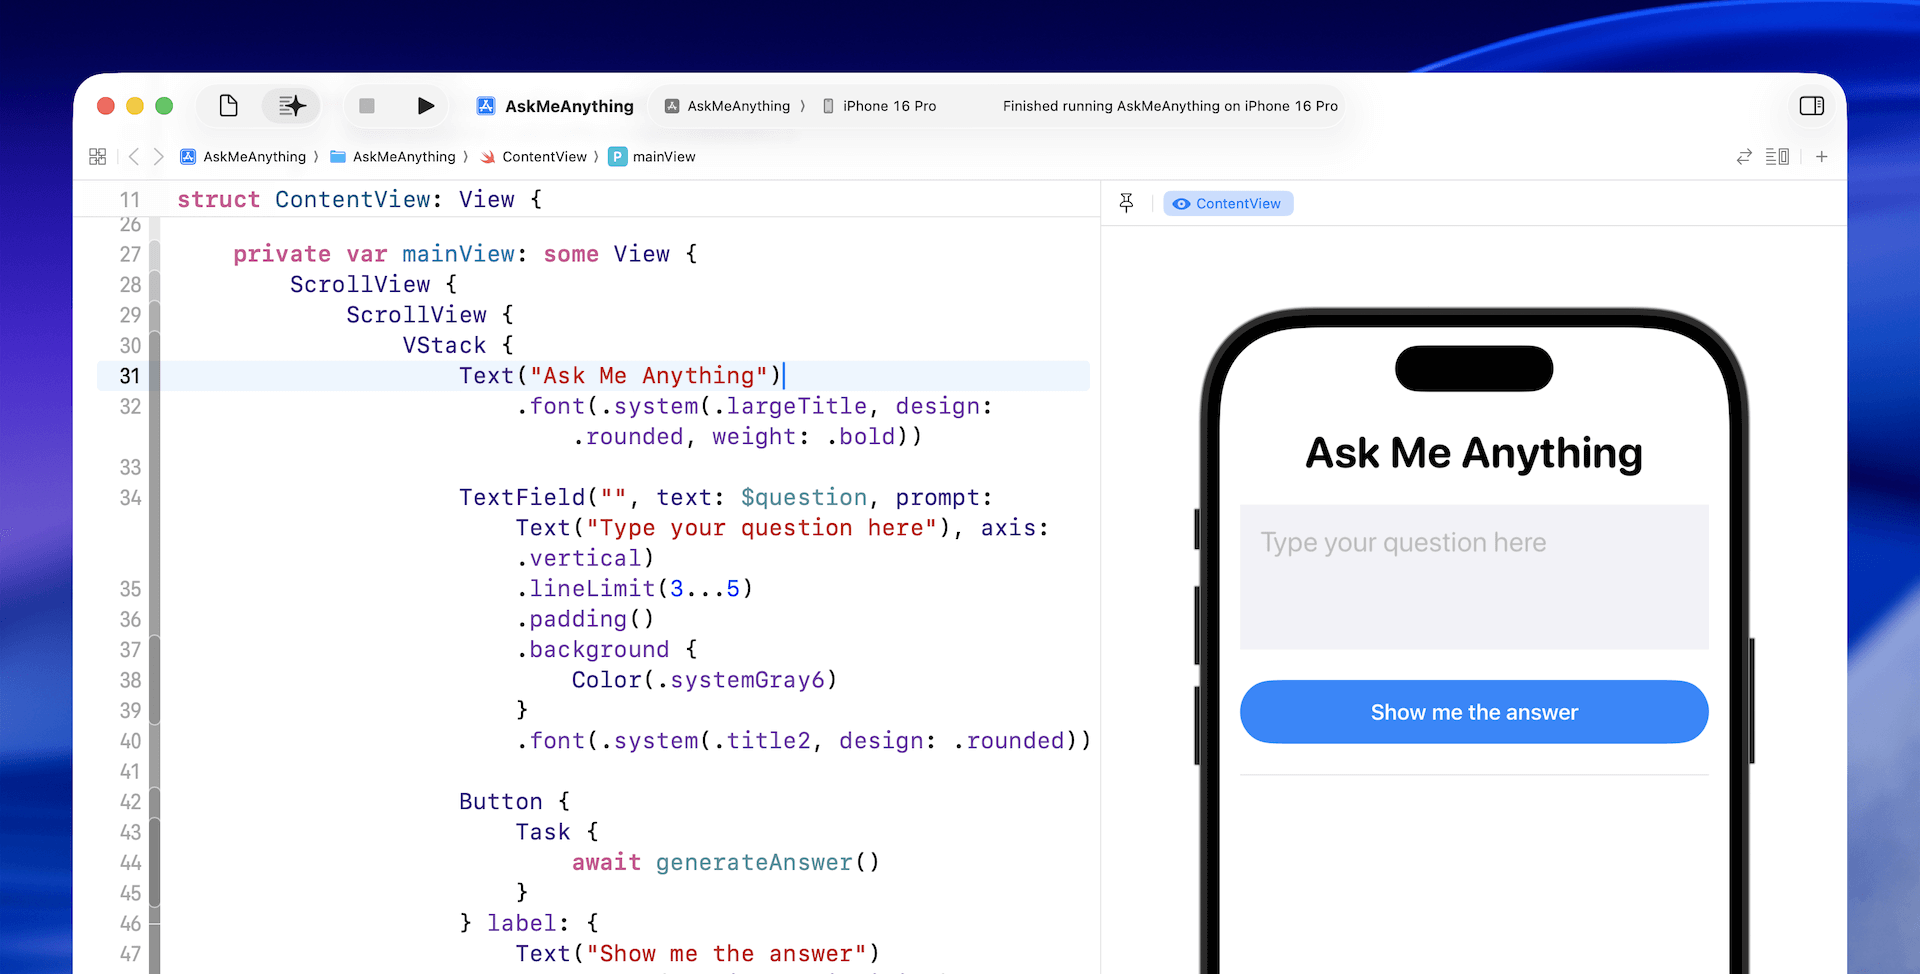
Implementing the UI
Let’s proceed to construct the UI of the mainView. We first add two state variables to retailer the person query and the generated reply:
@State personal var reply: String = ""
@State personal var query: String = ""
For the UI implementation, replace the mainView like this:
personal var mainView: some View {
    ScrollView {
        ScrollView {
            VStack {
                Textual content("Ask Me Something")
                    .font(.system(.largeTitle, design: .rounded, weight: .daring))

                TextField("", textual content: $query, immediate: Textual content("Sort your query right here"), axis: .vertical)
                    .lineLimit(3...5)
                    .padding()
                    .background {
                        Coloration(.systemGray6)
                    }
                    .font(.system(.title2, design: .rounded))

                Button {

                } label: {
                    Textual content("Get reply")
                        .body(maxWidth: .infinity)
                        .font(.headline)
                }
                .buttonStyle(.borderedProminent)
                .controlSize(.extraLarge)
                .padding(.prime)

                Rectangle()
                    .body(peak: 1)
                    .foregroundColor(Coloration(.systemGray5))
                    .padding(.vertical)

                Textual content(LocalizedStringKey(reply))
                    .font(.system(.physique, design: .rounded))
            }
            .padding()
        }

    }
}
The implementation is fairly easy – I simply added a contact of fundamental styling to the textual content area and button.
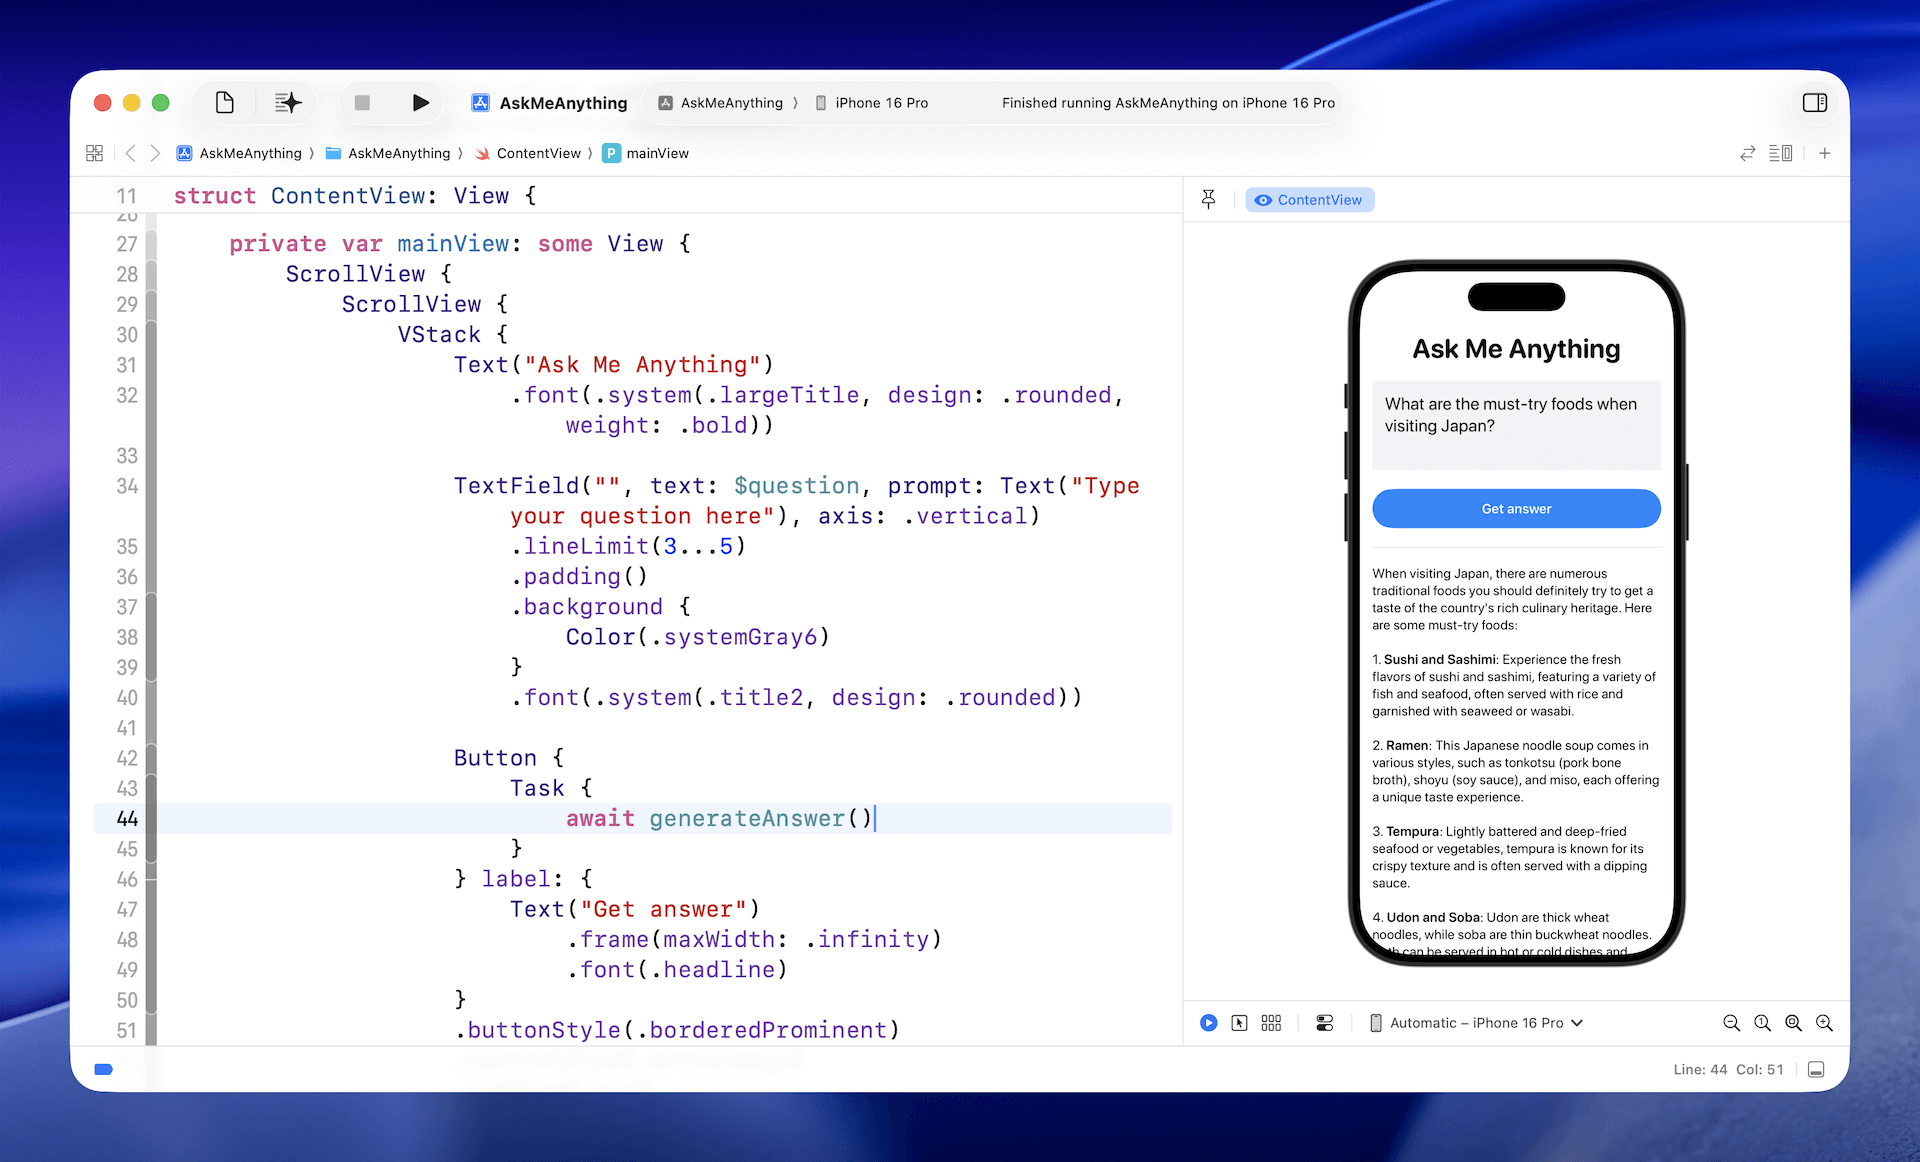
Producing Responses with the Language Mannequin
Now we’ve come to the core a part of app: sending the query to the mannequin and producing the response. To deal with this, we create a brand new perform referred to as generateAnswer():
personal func generateAnswer() async {
    let session = LanguageModelSession()
    do {
        let response = strive await session.reply(to: query)
        reply = response.content material
    } catch {
        reply = "Didn't reply the query: (error.localizedDescription)"
    }
}
As you possibly can see, it solely takes a couple of traces of code to ship a query to the mannequin and obtain a generated response. First, we create a session utilizing the default system language mannequin. Then, we cross the person’s query, which is called a immediate, to the mannequin utilizing the reply technique.
The decision is asynchronous because it often takes a couple of second (and even longer) for the mannequin to generate the response. As soon as the response is prepared, we will entry the generated textual content via the content material property and assign it to reply for show.
To invoke this new perform, we additionally must replace the closure of the “Get Reply” button like this:
Button {
    Job {
        await generateAnswer()
    }
} label: {
    Textual content("Present me the reply")
        .body(maxWidth: .infinity)
        .font(.headline)
}
You’ll be able to check the app immediately within the preview pane, or run it within the simulator. Simply kind in a query, wait a couple of seconds, and the app will generate a response for you.
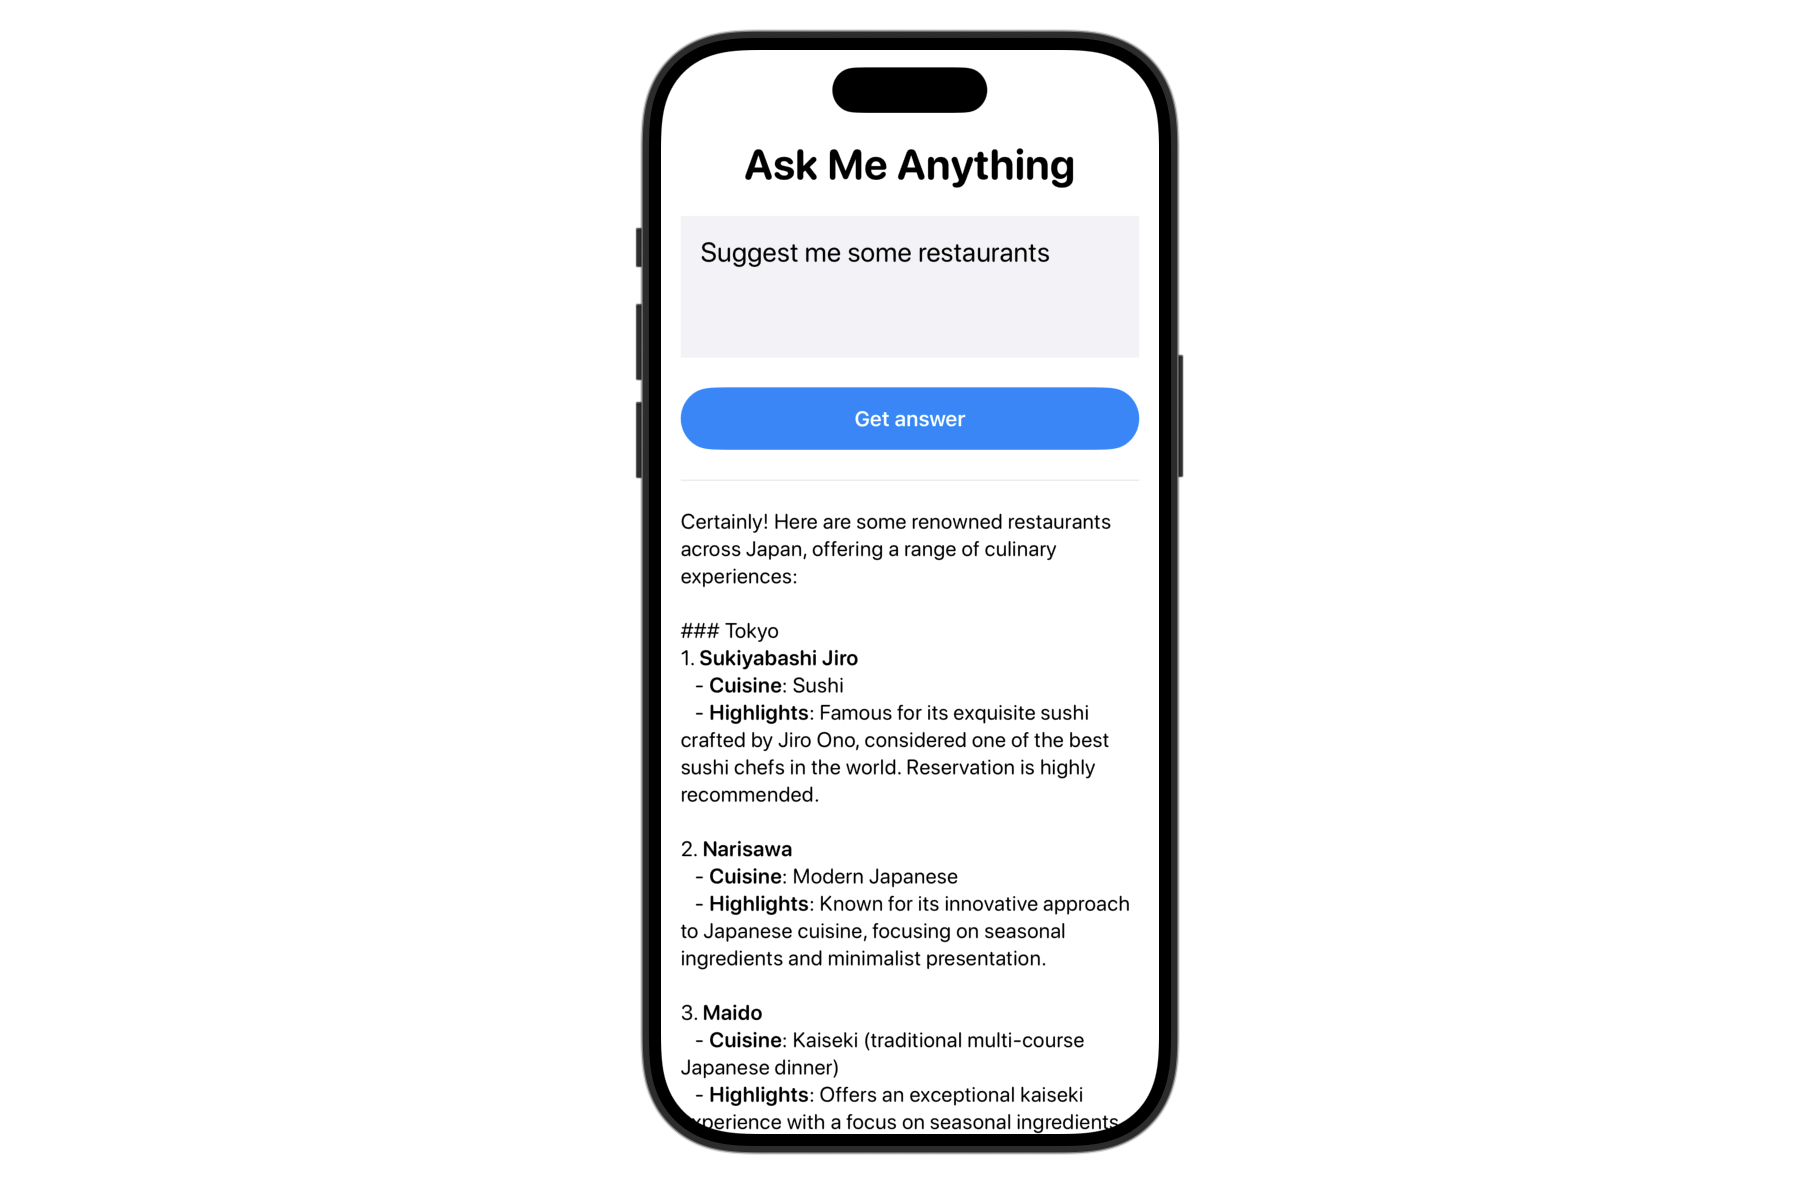
Reusing the Session
The code above creates a brand new session for every query, which works effectively when the questions are unrelated.
However what if you need customers to ask follow-up questions and maintain the context? In that case, you possibly can merely reuse the identical session every time you name the mannequin.
For our demo app, we will transfer the session variable out of the generateAnswer() perform and switch it right into a state variable:
@State personal var session = LanguageModelSession()
After making the change, strive testing the app by first asking: “What are the must-try meals when visiting Japan?” Then observe up with: “Counsel me some eating places.”
For the reason that session is retained, the mannequin understands the context and is aware of you are in search of restaurant suggestions in Japan.
If you happen to don’t reuse the identical session, the mannequin gained’t acknowledge the context of your follow-up query. As an alternative, it can reply with one thing like this, asking for extra particulars:
“Positive! To offer you one of the best options, may you please let me know your location or the kind of delicacies you are keen on?”
Disabling the Button Throughout Response Era
For the reason that mannequin takes time to generate a response, it’s a good suggestion to disable the “Get Reply” button whereas ready for the reply. The session object features a property referred to as isResponding that allows you to test if the mannequin is at the moment working.
To disable the button throughout that point, merely use the .disabled modifier and cross within the session’s standing like this:
Button {
    Job {
        await generateAnswer()
    }
} label: {
    .
    .
    .
}
.disabled(session.isResponding)
Working with Stream Responses
The present person expertise is not excellent — for the reason that on-device mannequin takes time to generate a response, the app solely reveals the consequence after the complete response is prepared.
If you happen to’ve used ChatGPT or related LLMs, you’ve most likely observed that they begin displaying partial outcomes nearly instantly. This creates a smoother, extra responsive expertise.
The Basis Fashions framework additionally helps streaming output, which lets you show responses as they’re being generated, relatively than ready for the entire reply. To implement this, use the streamResponse technique relatively than the reply technique. This is the up to date generateAnswer() perform that works with streaming responses:
personal func generateAnswer() async {

    do {
        reply = ""
        let stream = session.streamResponse(to: query)
        for strive await streamData in stream {
		        reply = streamData.asPartiallyGenerated()
        }
    } catch {
        reply = "Didn't reply the query: (error.localizedDescription)"
    }
}
Similar to with the reply technique, you cross the person’s query to the mannequin when calling streamResponse. The important thing distinction is that as an alternative of ready for the total response, you possibly can loop via the streamed information and replace the reply variable with every partial consequence — displaying it on display because it’s generated.
Now if you check the app once more and ask any questions, you may see responses seem incrementally as they’re generated, creating a way more responsive person expertise.
Customizing the Mannequin with Directions
When instantiating the mannequin session, you possibly can present optionally available directions to customise its use case. For the demo app, we’ve not supplied any directions throughout initialization as a result of this app is designed to reply any query.
Nevertheless, when you’re constructing a Q&A system for particular matters, you could need to customise the mannequin with focused directions. For instance, in case your app is designed to reply travel-related questions, you would present the next instruction to the mannequin:
“You’re a educated and pleasant journey professional. Your job is to assist customers by answering travel-related questions clearly and precisely. Give attention to offering helpful recommendation, suggestions, and details about locations, native tradition, transportation, meals, and journey planning. Hold your tone conversational, useful, and simple to grasp, as when you’re talking to somebody planning their subsequent journey.”
When writing directions, you possibly can outline the mannequin’s position (e.g., journey professional), specify the main target of its responses, and even set the specified tone or type.
To cross the instruction to the mannequin, you possibly can instantiate the session object like this:
var session = LanguageModelSession(directions: "your instruction")Abstract
On this tutorial, we lined the fundamentals of the Basis Fashions framework and confirmed the way to use Apple’s on-device language mannequin for duties like query answering and content material era.
That is just the start — the framework provides way more. In future tutorials, we’ll dive deeper into different new options equivalent to the brand new @Generable and @Information macros, and discover extra capabilities like content material tagging and gear calling.
If you happen to’re seeking to construct smarter, AI-powered apps, now could be the proper time to discover the Basis Fashions framework and begin integrating on-device intelligence into your initiatives.